CSEN1021
How to submit your first assignment?

Steps
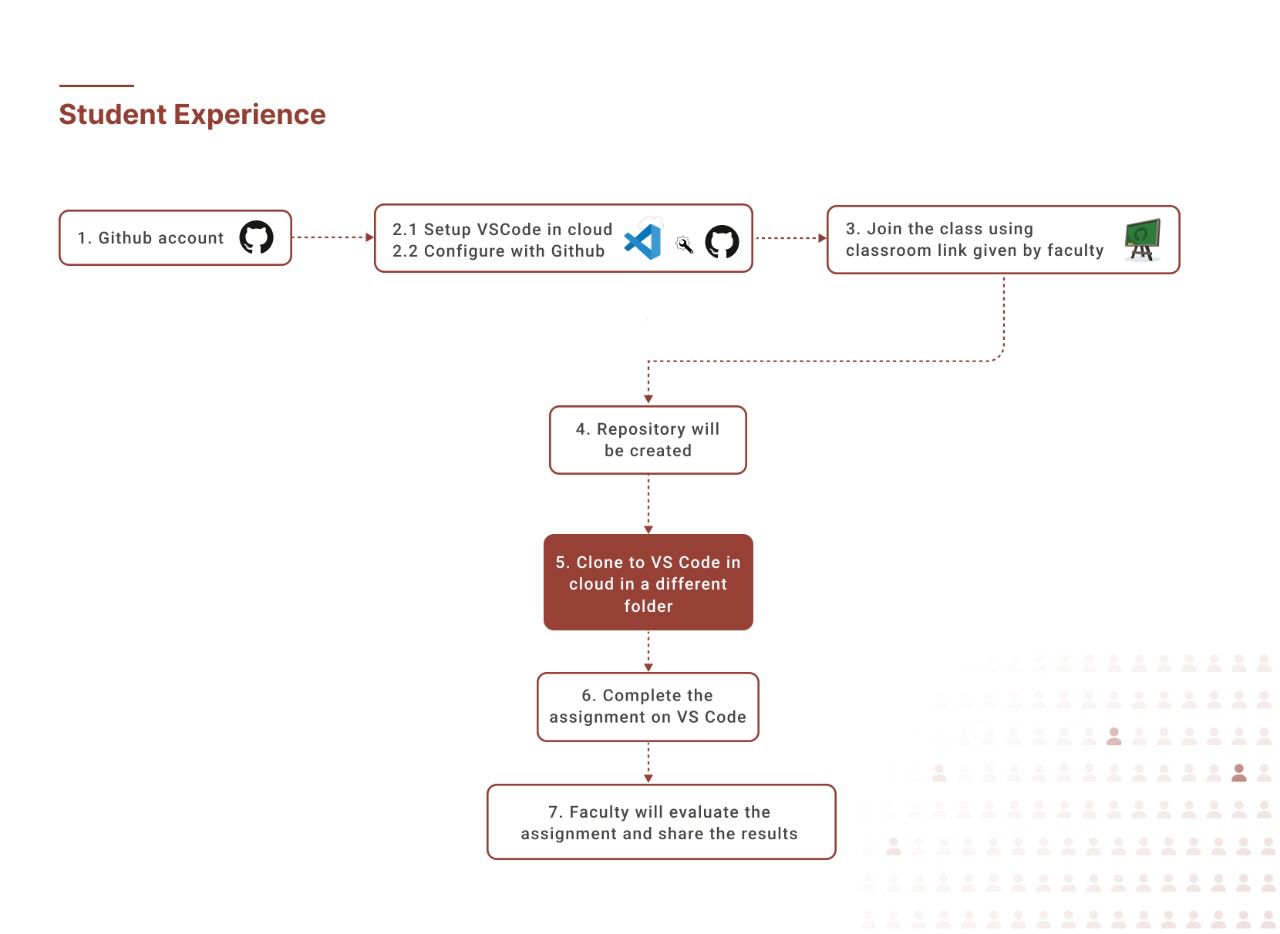
- Login to Github.
- Create a Dev machine in the cloud. Configure Github SSH with your Dev machine in the Cloud. Select the
GITAMfolder. - Accept the assignment.
- Working on the assignment.
- Submitting your assignment.
Step#1: Login to Github
Login to your github account.
Step#2.1: Create a Dev machine in cloud
Login via your Github account at https://code.cs50.io.
VSCode interface will be shown after it creates a Dev machine in the cloud.
Step#2.2: Configure Github SSH with your Dev machine in the cloud
- Open a terminal window, if not open already, within Visual Studio Code.
- Execute
ssh-keygen. When prompted to “save the key,” just hit Enter, without typing anything. - You’ll then be prompted for a “passphrase” (i.e., password). No need to input a passphrase; just hit Enter. You’ll then see a “randomart image” that you can ignore.
- Execute
cat ~/.ssh/id_rsa.pub. You’ll then see your “public key,” multiple lines of seemingly random text. Highlight and copy all of those lines, starting withssh-rsato the end. But don’t highlight your terminal window’s prompts (which contain$) before or after those lines. - Visit https://github.com/settings/keys, logging in with your GitHub username and password as usual.
- Click New SSH Key.
- Paste your public key into the text box under Key. Optionally input a title under Title (e.g.,
VSCode in Cloud). - Click Add SSH Key.
- Execute
ssh -T git@ssh.github.com -p 443. If it asksAre you sure you want to continue connecting (yes/no/[fingerprint])?, typeyes. After that you should be greeted withHi USERNAME! You've successfully authenticated, but GitHub does not provide shell access.If you don’t see that, review the above steps to verify you didn’t skip something.
Step#2.3: Configure GITAM folder and open it
- Open a terminal window, if not open already, within Visual Studio Code.
- Execute the following 2 commands to create a
GITAMfolder inside/workspacesfolder.cd /workspaces/ mkdir GITAM - Using VScode Menu click
File -> Open Folder...and select theGITAMfolder. You can see demo video.
Step#3: Accept the assignment
Open the link for the assignmnet given by your teacher. Accept the assignment. An assignment repository will be created for you.
Step#4: Working on the assignment
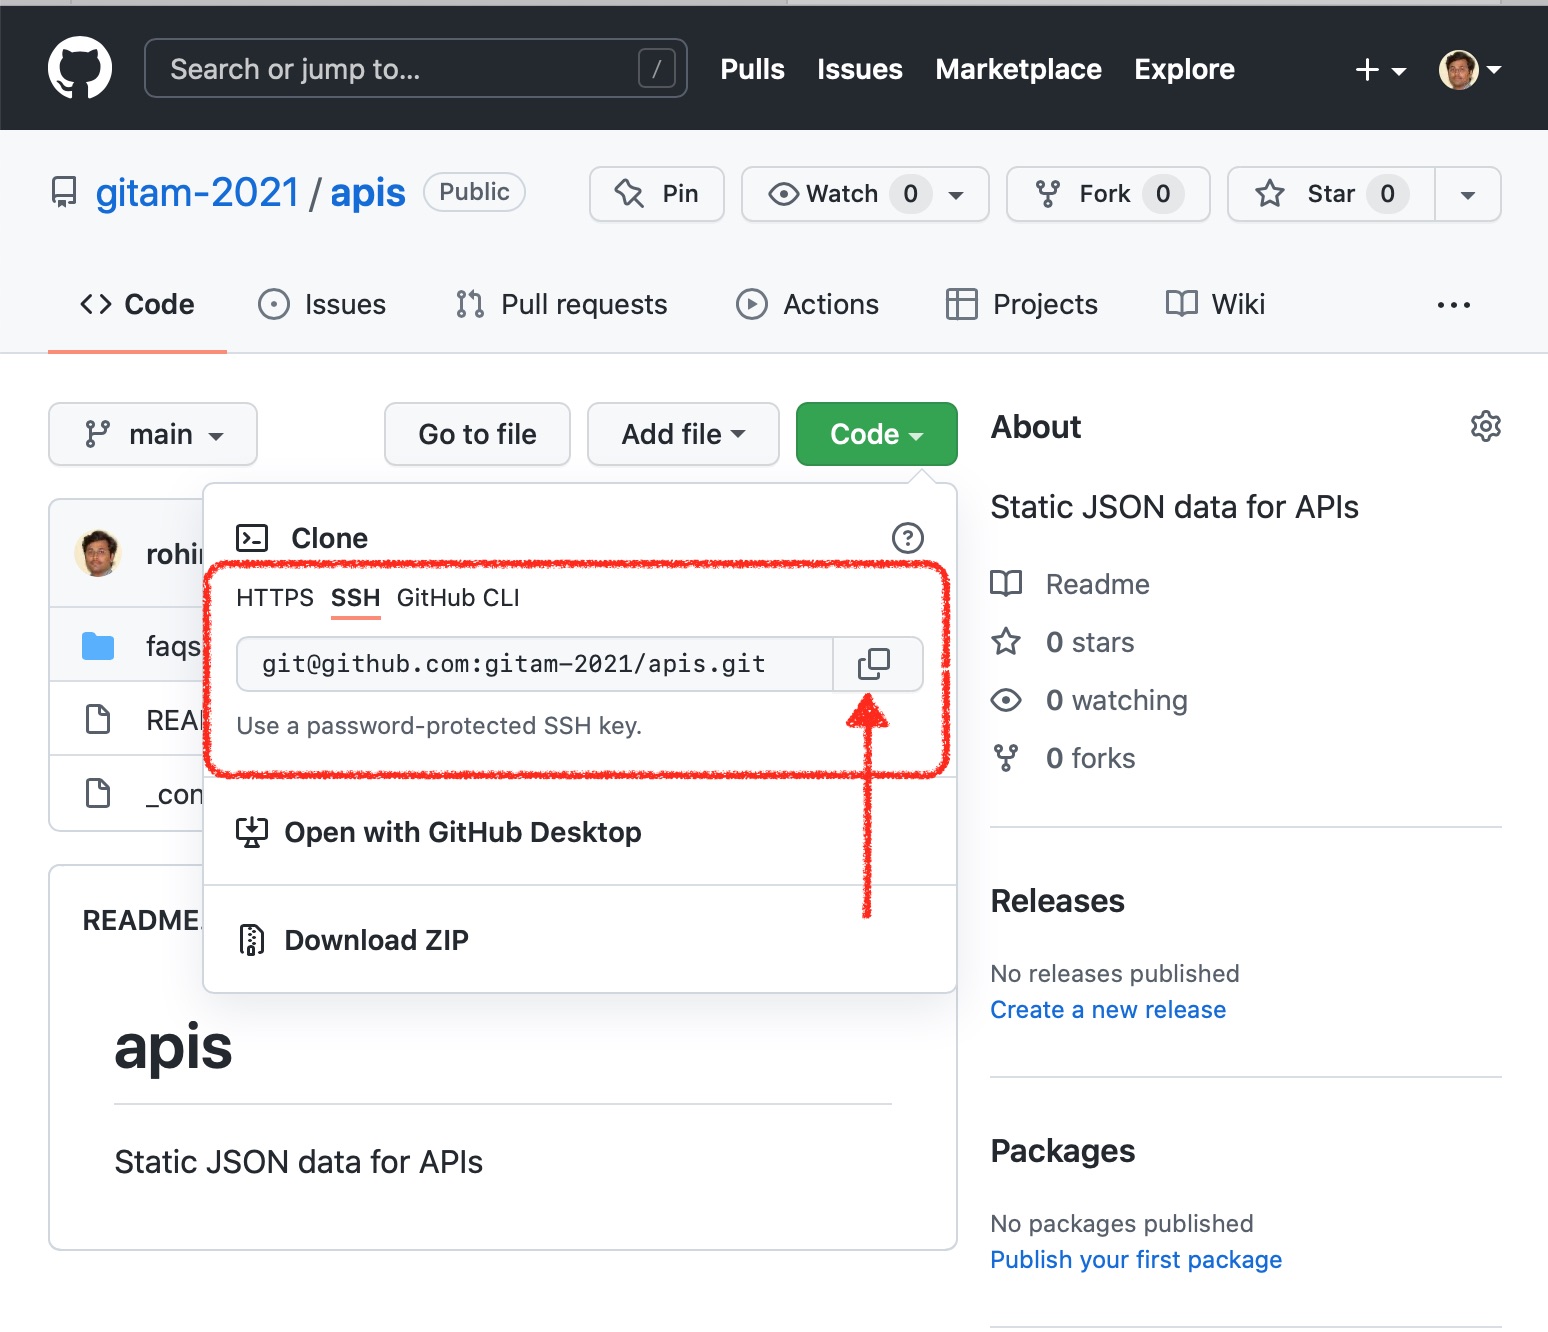
- Go to your assignment repository and copy the clone URL. Here is an example. You need to use your assignment repository.

- Open a terminal window, if not open already, within Visual Studio Code.
In the terminal if not already in
GITAMfolder, change directory toGITAM. Inside that type the following command.git clone <assignment-repository-url> - A folder will be created with the files of the assignment. Now expand the folder in the VSCode Explorer and start working on the code just like in the REPLIT editor.
Step#5: Submitting your assignment
You don’t need to do anything. Just compelete the assignment. Once the due date is completed, you updated assignment code snapshot will be taken and will be evaluated.